Rwedding Cake Card Holder
Does anyone know how to make those hat box wedding cake card holders??? I am making my own ... I`ve seen them for rent but for some big bucks. I`m on a budget and need to make it myself. HELP!!! I`ve already purchased the three hat boxes and white silk material.
Posted by Lisa; updated 07/18/03
Reply
Dear Lisa,
I am making one of those right now for a Sept. 6 wedding. If you still need some help, feel free to drop me a line. Good Luck
I am making one of those right now for a Sept. 6 wedding. If you still need some help, feel free to drop me a line. Good Luck
Posted by sue; updated 08/06/03
Reply
1. Put the lids on the boxes.
2. Cut out a space in the lids of the bottom boxes (a round hole, smaller than the box above it, but big enough to allow cards to pass through).
3. Glue the middle box to the lid of the bottom box and top box to the lid of the middle box (don`t glue the lids on or you won`t be able to get your cards out).
4. Cut a slit (appr. 1" by 6") in the lid of the top box.
5. Decorate as you see fit the rest of the card box cake with ribbon, flowers, bows, etc.
Good luck and have fun with this great craft (i`m doing the same thing)
Posted by Sarah; updated 08/06/03
Reply
Are you using material or paper to decorate the box ? what about the glue? spary adhesive, hot glue or a glue stick???? I am pretty ok w/ the decorations; pearls, lace, silk flowers ....just a little nervous about gettimg started
Lisa
Lisa
Posted by Lisa; updated 08/07/03
Reply
LillianVernon online has one for $25 it`s already decorated (all white) and it can be personalized not sure if that`s extra.
Instructions to build your own
When it comes to bridal crafts, don`t leave out the gift table. Here`s the recipe for a picture-perfect faux wedding cake that is created simply by stacking a set of hatboxes.
Tiers of Joy Wedding Cake Card Box
(From The Artful Bride)
Supplies:
3 papier-mâché hatboxes in graduated sizes (8 inches, 11 inches and 14 inches in diameter)
9 sheets of 20-inch by 30-inch decorative paper in three patterns, three sheets for each box
Spray adhesive
Craft knife
Foam or silk flowers
Sequins, rhinestones and/or trim
Bride and groom topper
10-inch piece of netting or tulle
Hot glue
Directions:
Remove lids from the 8-inch and 11-inch boxes. (These will not be used in the finished project.) Choose a pattern of paper for each box. Working with one box at a time, add a coat of spray adhesive to the bottom and outside and apply paper. Smooth out any bubbles with fingertips. You now have the three cake tiers.
Take the lid to the 14-inch box and make a slit 1 1/4 inches from the edge with the craft knife. Make it long enough so cards can easily fit through. Use spray adhesive and paper to cover the lid and the craft knife to cut through to the slit.
On all the boxes, cover up where paper edges meet by adding flowers, trim or rows of rhinestones.
Turn the top two tiers over. Hot-glue the 8-inch box to the center of the 11-inch box, then glue that box to the lid of the 14-inch box. Place the tiered lid on the 14-inch box. It will look like a round-tiered wedding cake.
Hot-glue the bride-and-groom topper to the top of the cake and affix the tulle to their heads so that it drapes down over the back of the cake. Place your wedding-cake card box on the gift table so guests can insert cards.
TIPS AND VARIATIONS: Use fabric, wrapping paper or paint instead of paper to match your wedding colors.
Posted by Jewel; updated 08/07/03
Reply
You can use material or paper. I am using material because i worry about ripping any expensive paper i would have to buy. I am going to use a hot glue gun. The trick is to work slowly so that the glue doesn`t dry before you attach the fabric. Spray adhesive would work well too. The reason why i chose hot glue was because you can carefully rip it off if you make a mistake. Just remember, work slowly, YOU CAN DO IT! the great thing about ribbons and bows and stuff is that you can use it to fix any mistakes that you make, just cover them up! it`s not really that difficult, just plan it out and go for it. The part i find most nerve wracking is the cutting of the holes in the boxes. Yours will be just beautiful, and it makes a nice keepsake for after the wedding too! if you are really nervouse, see if you have anyone crafty around who might be willing to help. Good luck
Posted by Sarah; updated 08/07/03

The Wedding Expert
Find the perfect wedding officiant on our site....

The Wedding Expert
Hire a professional and experienced videographer for your wedding day, you and your spouse will enjo...

The Wedding Expert
Limousine services for your wedding day....
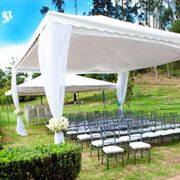
The Wedding Expert
We'll help you find every wedding rental you need for your special day....
Seating Arrangement.com
Seating Arrangement has arrived! This is the ultimate tool in planning any social event or functi...
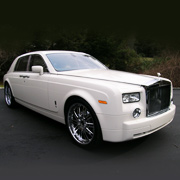
M & V Limousines - Long Island Limos
M&V Limousines Has been in business since 1993 offering our customers a unique transportation experi...
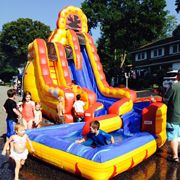
Fairytale Productions
We create fun with hours of interactive inflatables for kids & adults, and provide our clients on...

The Wedding Expert
Our bridal makeup artists will make sure you look and feel your best for your wedding day....


